Non-private IP Assignment
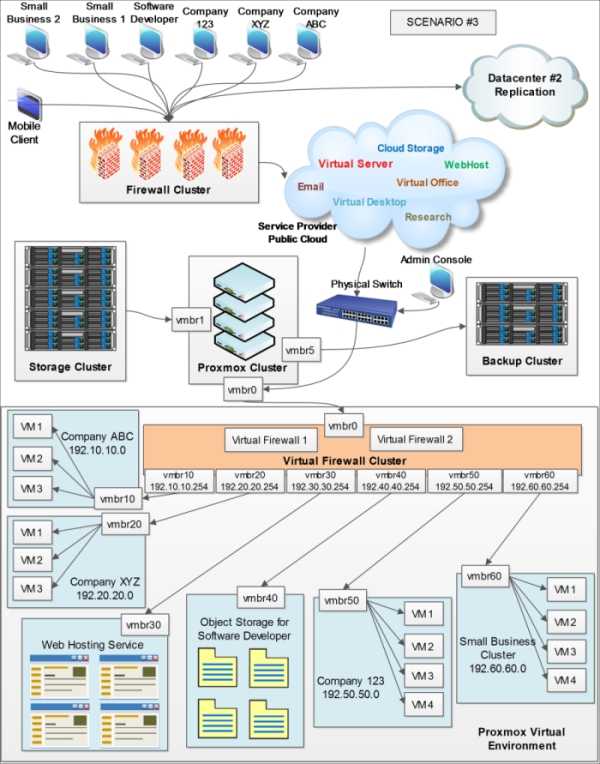
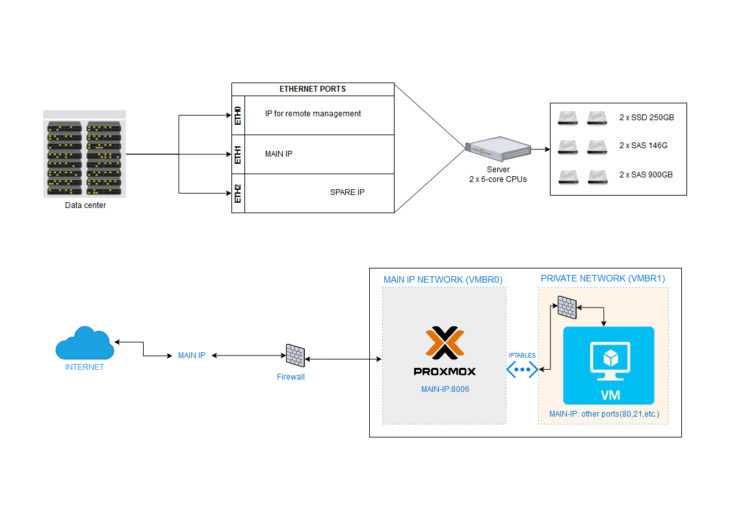
The setup as described above has separated your virtual servers from the internet by use of a zone (dmz) and A-class IP range (10.0.0.0/8). However, it is still possible to assign a non-private IP directly to one of your virtual servers if the venet network interface is used.
Internet traffic (from the net to the dmz zone) will still be blocked per the policy established in the above setup, and you will need to add additional rules to your Shorewall configuration. The major difference is that you must use ACCEPT instead of DNAT.
For example, let’s assume the IP address 91.121.0.1 was directly assigned to a virtual server. To permit internet Web traffic (port 80) to this container, add the following rule to your /etc/shorewall/rules file:
ACCEPT net dmz:91.121.0.1 tcp 80
Outgoing internet traffic
Due to this separation and the use of A-class (10.0.0.0/8) IP addresses, outgoing traffic from a virtual server to the internet needs to be translated (so that Shorewall and other Internet routers know where to send responses to).
This will be defined in the /etc/shorewall/masq file.
In its simplest form, /etc/shorewall/masq can be set to the follwing:
#INTERFACE SOURCE ADDRESS PROTO PORT(S) IPSEC MARKeth0 10.0.0.0/8# LAST LINE -- DO NOT REMOVE
This means that all traffic originating from 10.0.0.0/8 and going to the internet will pass through the eth0 network interface using the IP address assigned to eth0.
If you wish to make all traffic appear from a particular IP addresses, it can be specified as the third parameter. For example:
eth0 10.0.0.0/8 91.121.0.1
Or perhaps there’s a specific internal IP address that must appear externally as another IP address, you can do this as folowing:
+eth0 10.0.1.101 91.121.0.2eth0 10.0.0.0/8 91.121.0.1
Notice the plus (‘+’) sign in front of eth0. All traffic from 10.0.0.0/8 will appear to be coming from IP 91.121.0.1, except traffic coming from 10.0.1.101 will appear as coming from 91.121.0.2.

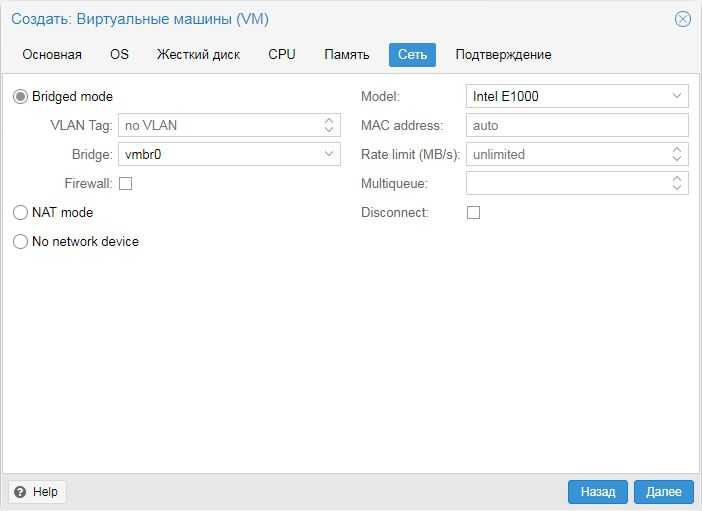
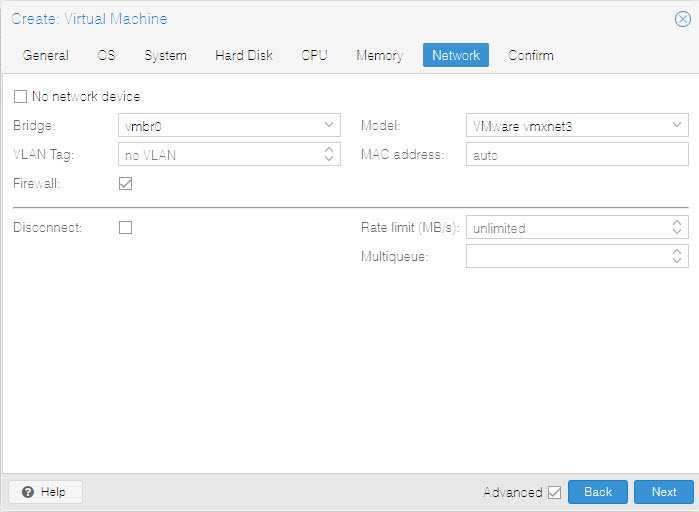
Bridged Networking
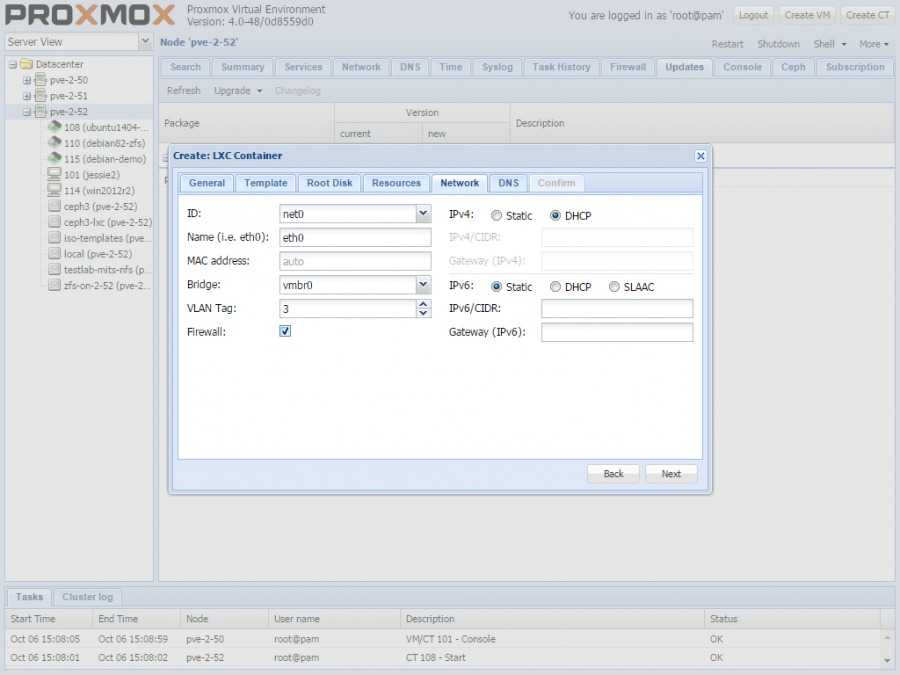
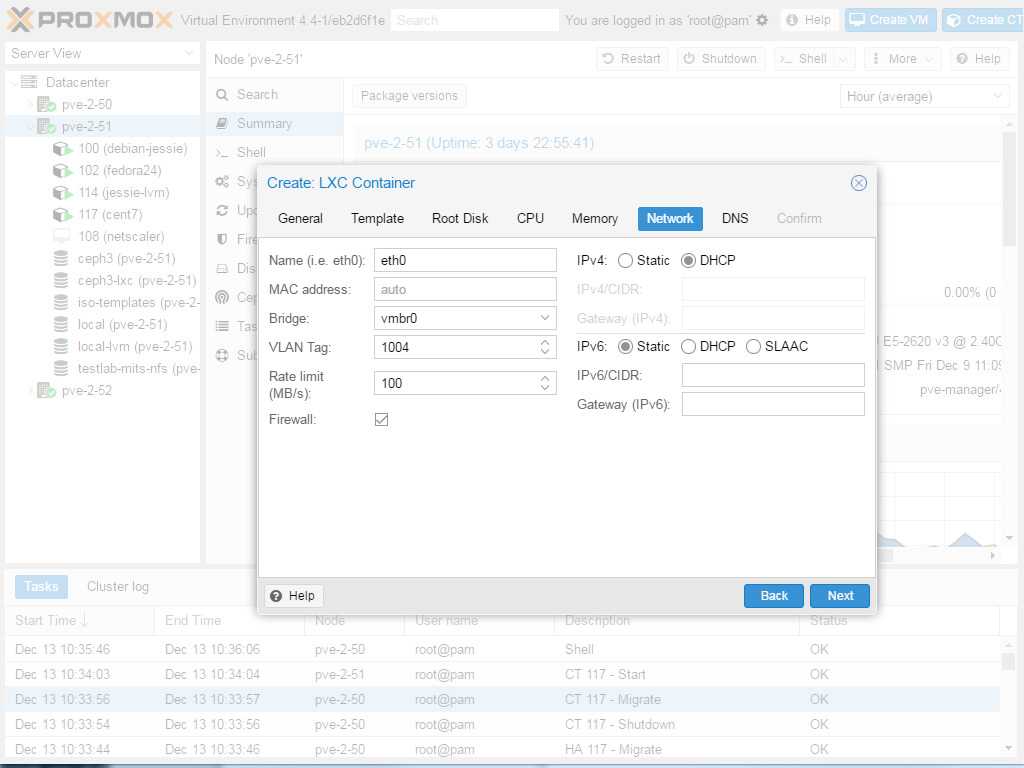
The venet network interface is certainly the simplest method to use in Proxmox. However, venet is not available in KVM (fully virtualized servers) and there may be another reason why you might want to use the veth network interfaces with regular containers (such as the use of DHCP).
For this reason the vmbr0 network interface on the host was reconfigured to use the IP address of 10.254.254.254. It will act as the gateway entry for those virtual servers using veth network interfaces.
Although additional configuration needs to be done within a virtual server, you can use the same Shorewall rules for in- and outgoing traffic as described earlier (ie., DNAT or outgoing traffic).
Updating the eth0 network interface
If you have reached this section, then your vmbr0 network interface was most likely directly bridged with your eth0 network interface, meaning that vmbr0 contains your public IP address, network gateway and other settings. Because we will turn vmbr0 into a blind bridge in the next section, we need to create or edit a separate eth0 stanza in the /etc/network/interfaces file first.
In the previous steps we have obtained all the information required for this purpose (using the ifconfig and route commands). This information may already be present in your vmbr0 stanza as well, in which case you can use this instead.
We edit the eth0 stanza to look as following:
auto eth0 ifaceeth0 inet static address 91.11.22.33 netmask 255.255.255.0 broadcast 91.11.22.255 gateway 91.11.22.254
Where the example IPs are replaced by the actual address, netmask, broadcast and gateway IPs found in the previous steps or obtained from the current vmbr0 stanza.
WARNING! It is important to understand that editing the eth0 stanza can lead to an inability to connect to the server if done incorrectly. If you rely on remote access such as SSH, or if you are uncertain about the information that needs to be entered in the various fields, please contact your administrator or hosting provider for assistance. As always, use care and make backups of existing files.
Policy
A base policy needs to defined for each one of the zones. It specifies the default actions on in- and outgoing traffic, and in this article the following policies will be defined:
Traffic from the firewall to:
- the internet is permitted
- DMZs is permitted
- other processes on the firewall is permitted
Traffic from the DMZ (virtual servers) to:
- another virtual server is permitted
- the internet is permitted
- the firewall is denied and 1 information message per second (with a burst of 2) will be record when access is attempted.
Traffic from the internet to:
- the firewall is denied
- DMZs is denied, generating 8 messages per second (with a burst of 30 messages) whenever access is attempted.
Any traffic not defined in any of the zones (either by accident or purposely) will be rejected.
To do this, we will create the /etc/shorewall/policy file:
#SOURCE DEST POLICY LOG LIMIT: CONNLIMIT:# LEVEL BURST MASK# From Firewall Policyfw fw ACCEPTfw net ACCEPTfw dmz ACCEPT# From DMZ Policydmz dmz ACCEPTdmz net ACCEPTdmz fw DROP info# From Net Policynet fw DROP infonet dmz DROP info# THE FOLLOWING POLICY MUST BE LAST#all all REJECT info
For those who have followed this guide before and are experiencing some performance issues, please remove the limit burst options after “info”, ie “1/sec:2”. The reason is that this takes priority over rules; this was a painful discovery on my end!
Testing Configuration
After creating the files, your /etc/shorewall/ directory might look similar to:
drwxr-xr-x 2 root root 4096 2009-07-01 06:36 .drwxr-xr-x 82 root root 4096 2009-07-06 10:03 ..-rw-r--r-- 1 root root 522 2009-06-26 20:05 interfaces-rw-r--r-- 1 root root 453 2007-11-15 23:24 Makefile-rw-r--r-- 1 root root 781 2009-06-26 21:16 policy-rw-r--r-- 1 root root 2355 2009-07-02 22:42 rules-rw-r--r-- 1 root root 4134 2009-06-20 21:58 shorewall.conf-rw-r--r-- 1 root root 438 2009-06-26 20:04 zones
Before using the configuration you will want to test it first, particularly to make sure you are not blocking SSH access. Issue the following command:shorewall try /etc/shorewall 60
The parameter 60 refers to 60 seconds. Shorewall will use the configuration located in /etc/shorewall/ for 60 seconds and then reverts to the previous settings (or no firewall).
After issuing the command, establish a new connection to your server using SSH and check whether your Proxmox web-based manager is accessible. If you are receiving error messages from Shorewall or you are unable to access SSH during the 60-second test period, please verify the configuration and try again.
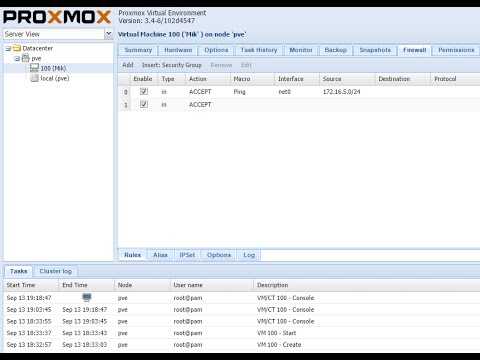
Basic Rules
The policy defined earlier will deny any traffic coming from the internet to the firewall, which will include the SSH service and the Proxmox web-based manager. Since this is undesirable, a few rules need to be created that override this base policy.
Create the /etc/shorewall/rules file:
#ACTION SOURCE DEST PROTO DEST SOURCE ORIGINAL RATE# Permit access to SSHSSH/ACCEPT net fw — — — — 6/min:5# Permit access to Proxmox Manager and ConsoleACCEPT net fw tcp 443,5900:5999# PING RulesPing/ACCEPT all all# LAST LINE — DO NOT REMOVE
As you may notice, there is also an additional rule for ping. For testing purposes, it would be wise to permit a ping from and to any of your zone, including the internet.
The SSH/ACCEPT rule is in fact a macro that comes with Shorewall. You could also define the same rule as following:
ACCEPT net fw tcp 22 — — 6/min:5
Also, at the very end of the SSH rule you notice “6/min:5”. This specifies the connection rate and in this case it reduces the connection rate to 6 per minute (1 per 10 seconds) with a maximum initial burst of 5. It is added here to slow down brute force SSH attacks.
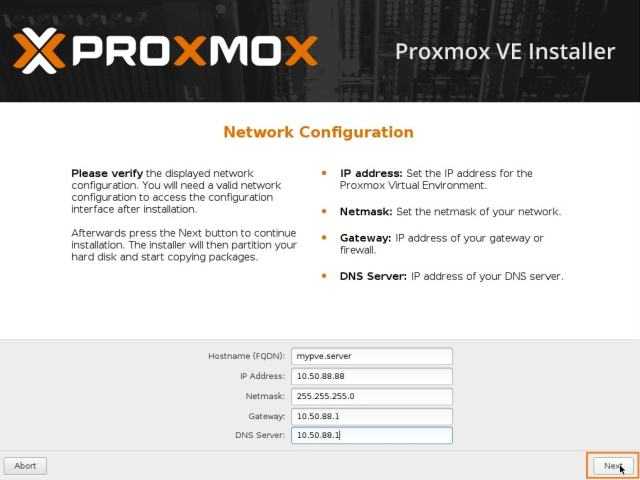
Determine the current network configuration
Before we do this, we need to determine the current network configuration because this can be different depending on the hosting provider and other factors. Assuming that eth0 is the network interface that connects the server to the Internet, we issue the following command:
ifconfig eth0
This will give an output similar to:
eth0 Link encap:Ethernet HWaddr 00:ff:ff:ff:ff:ff inet addr:91.11.22.33 Bcast:91.11.22.255 Mask:255.255.255.0...
It gives us the current IP address, broadcast address and netmask used by eth0. One last piece of information we need is the gateway used by eth0, which is obtained with the follwing command:
route -n
You will see an output similar to:
...0.0.0.0 91.11.22.254 0.0.0.0 UG 0 0 0 eth0
The first column of 0.0.0.0 designates the default route (any traffic that has no specific route), and the second column the gateway. Now that we have obtained all this information, we can edit the /etc/network/interfaces file.


First we need to verify that eth0 has already been defined within this file. It will look similar to:
auto eth0iface eth0 inet static address 91.11.22.33 netmask 255.255.255.0 broadcast 91.11.22.255 gateway 91.11.22.254...(additional stanzas)...
Where the IPs match those you have obtained by use of the ifconfig and route commands.
Or if your server uses DHCP to assign the IP address then it will look similar to:
allow-hotplug eth0iface eth0 inet dhcp…(additional stanzas)…
If either is the case, you can skip the follow section and continue to change the vmbr0 network interface.
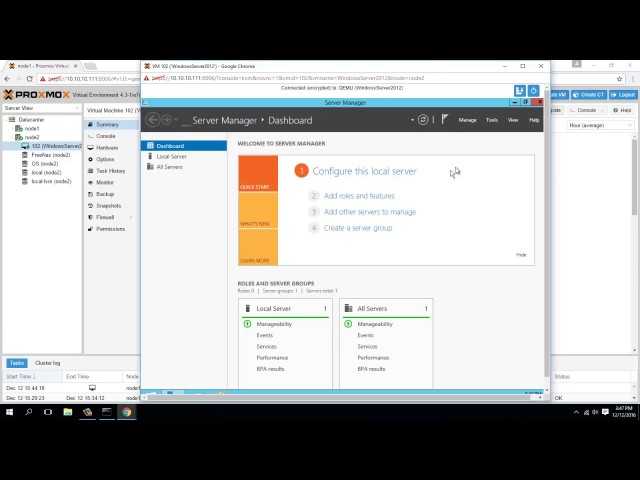
Microsoft Windows
For networking within Windows, proceed to your Networking control panel (or the Network and Sharing Center). Select the appropriate Local Area Connection and right-click to reveal the Properties menu option. UAC (User Account Control) may request your permission to proceed.
In the list of This connection uses the following items, select Internet Protocol (TCP/IP) (or Internet Protocol Version 4 (TCP/IPv4)). Click the Properties button.
At the General tab, change the following selections:Use the following IP address:
IP address: 10.0.1.101Subnet mask: 255.0.0.0Default gateway: 10.254.254.254
Use the following DNS server addresses:
Preferred DNS server: xxx.xxx.xxx.xxxAlternate DNS server: yyy.yyy.yyy.yyy
Where xxx… and yyy… are your preferred DNS servers.