Proxmox Networking: Routed Networking
If you would like to hide your VM’s behind the host IP you can use a routed networking configuration. You have to create another virtual network interface and enable routing on this interface.
Open this file again:
When working with a routed configuration, you need to enable proxy arp on the outgoing interface. In my scenario, this is “eth0”:
To create the virtual interface and enable routing add those lines:
The last line will enable routing on the interface. With this configuration the VM traffic will routed using the routing table of the host. The outside world needs to know, how to reach the “10.3.5.0/24” subnet. To avoid working with static routes, you could NAT the traffic. This will hide the “10.3.5.0/24” subnet behind the IP address of the Proxmox host. To enable the NAT function add those lines to the virtual network interface:
This will enable the NAT function for the internal network “10.3.5.0/24” by using “eth0” as the egress network.
From my point of view, this describes the three main Proxmox networking options. There are other options, e.g. using a virtual switch or router on the host.
If you have any questions, regarding this post or if you would like provide feedback, please use the comment function below.
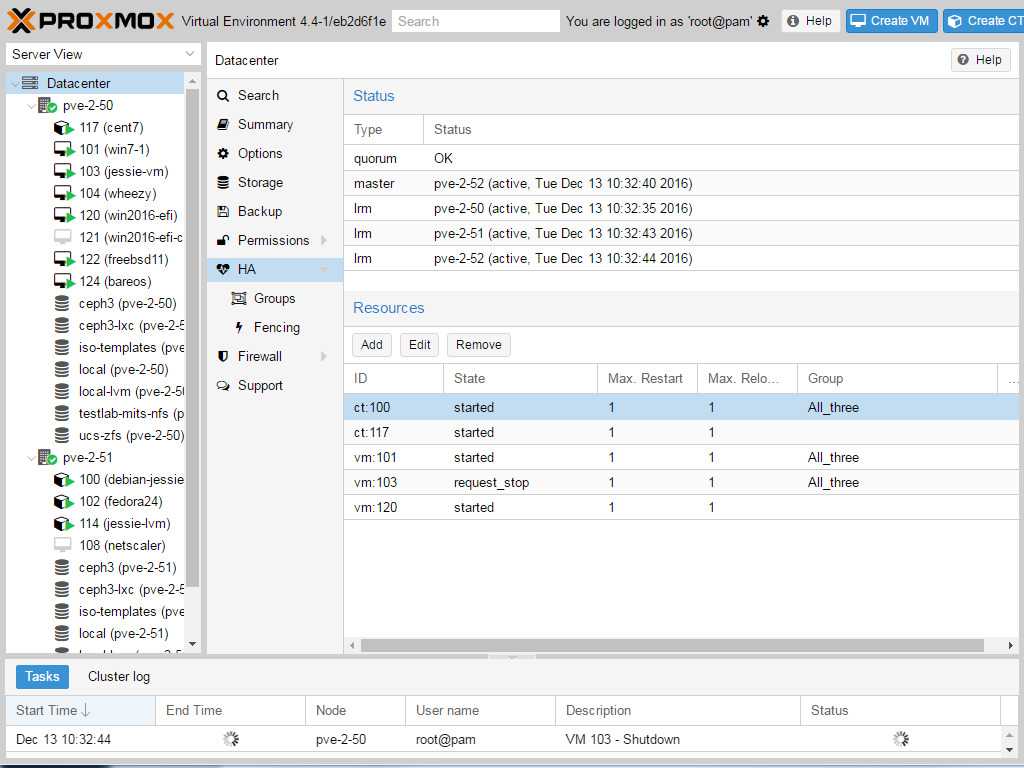
Proxmox VE High Availability (HA) Cluster
A multi-node Proxmox VE Cluster enables the creation of highly available virtual servers. The Proxmox VE HA Cluster is based on proven Linux HA technologies, providing stable and reliable HA service.
Proxmox VE HA Manager
The resource manager, Proxmox VE HA Manager, monitors all VMs and containers in the cluster and automatically comes into action if one of them fails. The Proxmox VE HA Manager works out-of-the-box. Zero configuration is needed. Additionally, the watchdog-based fencing dramatically simplifies deployment. The entire Proxmox VE HA Cluster can be easily configured from the integrated web-based user interface.
Proxmox VE HA Simulator
Proxmox VE includes a HA Simulator. This allows you to test the behavior of a real-world 3 node cluster with 6 VMs. The Proxmox HA Simulator runs out-of-the-box and helps you to learn and understand how Proxmox VE HA works.
Backup and Restore
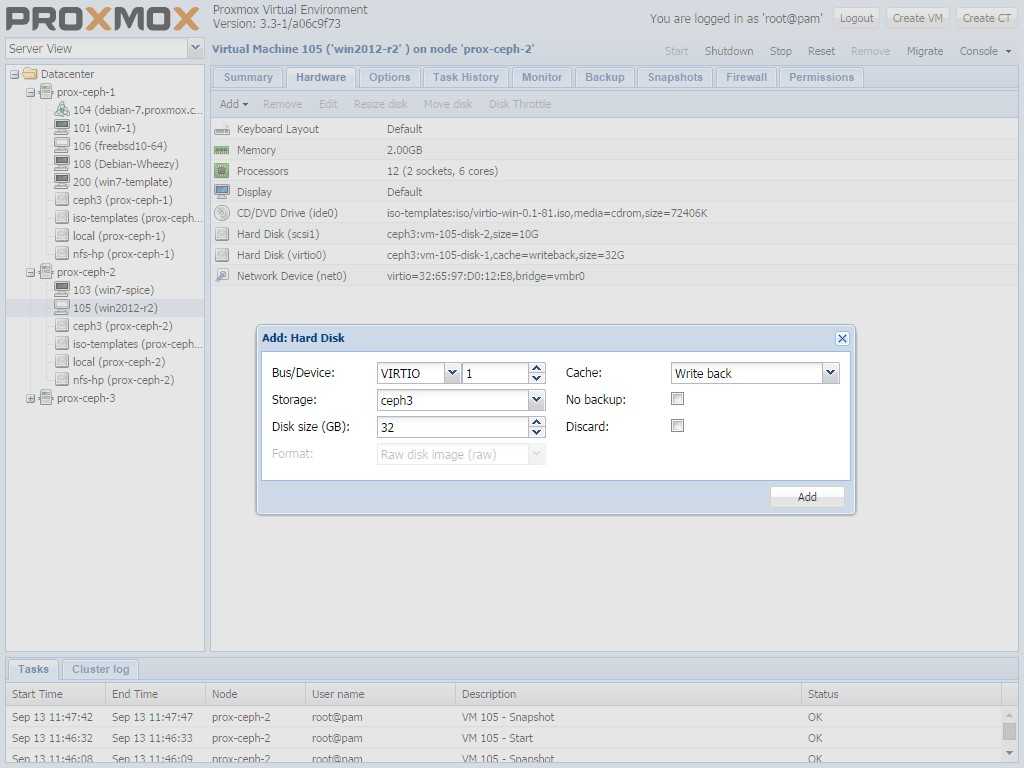
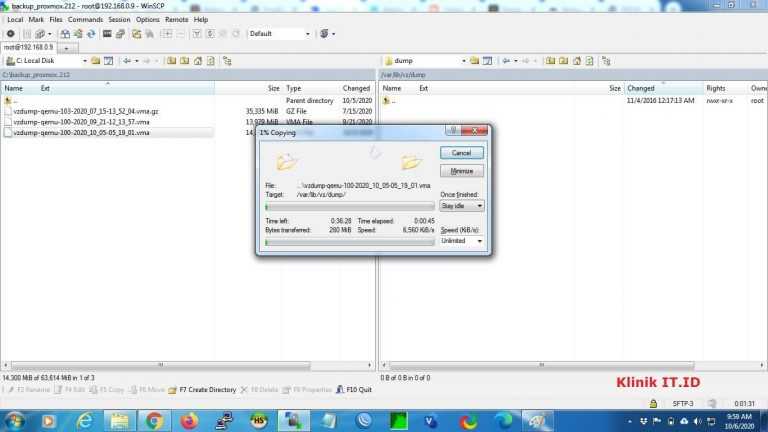
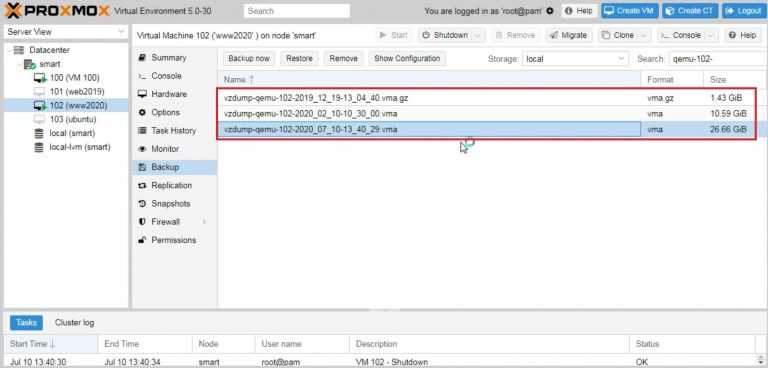
Backups are a basic requirement for any sensible IT environment. The Proxmox VE platform provides a fully integrated solution, using the capabilities of each storage and each guest system type. Backups can be easily started with the GUI or with the vzdump backup tool (via command line). These backups are always full backups — containing the configuration of VMs and container, and all data.
The integrated backup tool (vzdump) creates consistent snapshots of running containers and KVM guests. It basically creates an archive of the VM or container data and also includes the configuration files.
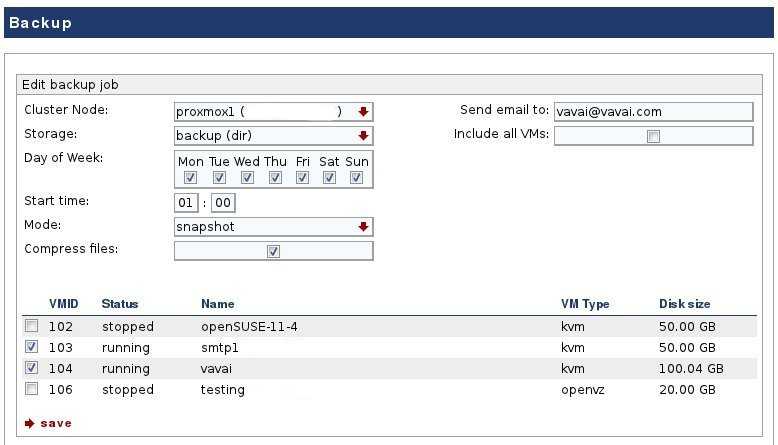
Scheduled Backup
Backup jobs can be scheduled so that they are executed automatically on specific days and times, for selectable nodes and guest systems.
Backup Storage
KVM live backup works for all storage types including VM images on NFS, iSCSI LUN, and Ceph RBD. The Proxmox VE backup format is optimized for storing VM backups quick and effectively (accounting for sparse files, out of order data, minimized I/O).
Read how to configure Proxmox VE Backup and Restore
Proxmox VE Firewall
The built-in Proxmox VE Firewall provides an easy way to protect your IT infrastructure. The firewall is completely customizable, allowing complex configurations via the GUI or CLI.
You can set up firewall rules for all hosts inside a cluster, or define rules for virtual machines and containers only. Features like firewall macros, security groups, IP sets and aliases help to make that task easier.
Distributed Firewall
While all configuration is stored in the cluster file system, the iptables-based firewall runs on each cluster node, and thus provides full isolation between virtual machines. The distributed nature of this system also provides much higher bandwidth than a centralized firewall solution.
IPv4 and IPv6
The firewall has full support for IPv4 and IPv6. IPv6 support is fully transparent, and we filter traffic for both protocols by default. Thus, there is no need to maintain a different set of rules for IPv6.
Read more about the Proxmox VE Firewall
Why VLAN bridge?
Firstly, let’s see the benefits of choosing a VLAN bridge.
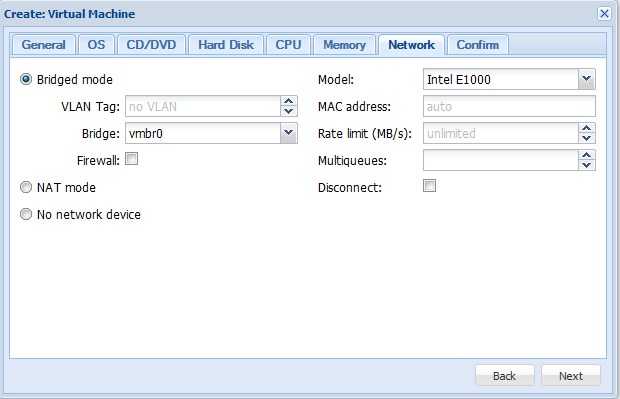
Proxmox allow multiple ways to configure the network. This includes bridged, routed, or masquerading networking setup. And, the choice further depends on the network set up of each customer.
By default, new Proxmox installation comes with the Proxmox VLAN bridge mode. Here, we setup Proxmox VE server in a private LAN. And, it uses an external gateway to reach the internet.
Additionally, each guest machine will have a virtual interface attached to the Proxmox VE bridge. As a result, the Guest network card will be directly connected to a new switch on your LAN. In other words, the Proxmox VE host plays the role of the switch.
Again, at this point, it is worth to remember that a virtual LAN (VLAN) allow isolation in the network too. Thus, it helps to setup multiple networks in a physical network, each independent of the other ones. And, that’s another reason why our Support Engineers often recommend Proxmox VLAN bridge mode to customers.
Steps to setup Proxmox VLAN bridge
Now, it’s time to see the steps to setup Proxmox VLAN bridge.
Firstly, we complete the Proxmox installation and the initial setup. This automatically configures the basic network. Further, we proceed with the VLAN bridge setup. We’ll now see the steps one by one.
1. Creating VLAN bridge
Luckily, Proxmox allows the creation of VLAN and bridge from the web interface. We’ll now check the actual steps that our Support Engineers do for this setup.
Usually, Proxmox VE uses a specific notation on the network interface when implementing VLAN’s. Each VLAN network has a specific number often called tag. And, these tags help to identify the network packages that belong to each virtual network.
To add the bridge from the web interface, we get into the System configuration page > Network Settings > Interface Configuration section. Then, from the drop down menu we select “Create Bridge Devices”.
In the form, we fill out the bridge name, network card details, etc. Here, our Dedicated Engineers ensure that the VLAN number is a value less than 4094, IP address is set as 0.0.0.0 with auto-start option selected for bridge. For example, the exact bridge creation interface will look as shown in the picture.
2. Rebooting Proxmox VE
The exact bridge setup can vary as per the requirement of customers. Some prefer a setup in which all VMs share a single bridge. Or some may need multiple bridges to separate network domains. After configuring the bridges, the next step is to reboot the Proxmox VE host. This will ensure that the new bridge configuration is updated properly.
When the server is back online, our Dedicated Engineers double check the bridge configuration. A sample network setup with ethernet devices eno1, eno2 and bridge vmbr0 will look as shown here.
3. Connect VM to VLAN
Now, its time to connect the virtual machines to the proper VLAN. For this, our Support Engineers set the correct bridge name for each guest. And, that ensures that the network interface of the virtual machine is connected to the correct network bride.
Finally, the virtual machine has network connectivity now.
Common errors with VLAN bridge and their fixes
With our experience in managing Proxmox servers, we often see customers reporting problems with wrong VLAN setup. Let’s check the top few errors and their fixes.
1. Trouble reaching guest in VLAN
Recently, one of our customers reported problems when trying to ping a guest machine configured on VLAN. However, he was able to connect to eth0.xx bridge in Proxmox VE host.
To fix the problem with connectivity, we started with checking the bridge configuration on Proxmox. Here, we could see that customer was using tagged and untagged networks on the same interface. To restore connectivity, our Dedicated Engineers had to bind the bridge to VLAN interface correctly, using the command :
2. Error finding bridge port
Similarly, Proxmox VLAN can have problems finding the bridge port too. Here, although VLAN works, trying to modify a bridged VLAN, or even delete it, results in an error message saying :
This error happens as Proxmox was unable to find the bridge. To fix this problem, our Dedicated Engineers had to create a bridge with the VLAN. We added the following entry in the file /etc/network/interfaces
And, that fixed the problem.
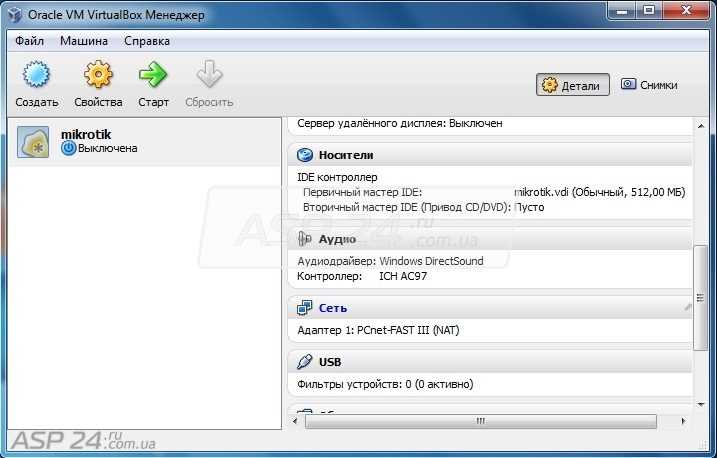
Реализация
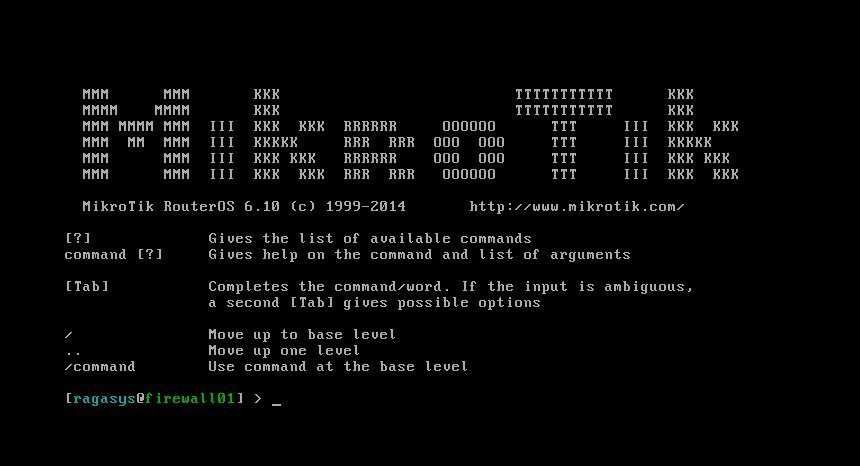
Поднимаем первой виртуалкой chr по .
Если пользуетесь приведенным скриптом, обратите внимание, что проверяется в начале наличие каталога -d /root/temp, а если его нет, создается каталог /home/root/temp, однако работа дальше ведется все равно с каталогом /root/temp. Скрипт необходимо исправить для создания соответствующего каталога
Добавляем сабинтерфейс с номером VLAN, указываем, что настройка адресов будет происходить на бриджах используя inet manual
ВАЖНО. Нельзя настраивать IP-адреса на интерфейсах, которые вы затем будете включать в бридж, как это будет работать и будет ли вообще никому неизвестно
После переписки со службой поддержки Hetzner стало ясно, что добавить дополнительный мак для подсети так же, как и для выделенного адреса они не смогут. То есть нельзя включать в бридж локальный интерфейс на сервере и интерфейс нашей виртуальной машины CHR. Hetzner присылает уведомление с требованием убрать лишний мак. Убираем бридж vmbr0 и назначаем адрес напрямую на интерфейс eno1.

Далее создаем бридж vmbr1 – и вешаем на него произвольный адрес, который будет конечной точкой наших маршрутов из CHR, а так же указываем дополнительной командой добавление маршрута на нашу дополнительную сеть, заказанную в Hetzner для этого сервера через этот бридж. Добавление маршрута сработает, когда интерфейс поднимается.
Вторым бриджом будет у нас интерфейс для локального трафика, добавляем на него адрес для получения связности между разными серверами Proxmox по локальной сети без выхода в интернет и указываем портом сабинтерфейс eno1.4000, который выделен для нашего VlanID.
При начальной настройке попадаются советы, что можно поставить для Proxmox дополнительно пакет ifupdown2 и можно при изменениях в сетевых интерфейсах сервер целиком не перезагружать. Однако это характерно только для первичной настройки, и при использовании бриджей и настройке уже виртуальных машин сталкиваешься с проблемами отвала сети в виртуалках. При том, что вы правили, например, интерфейс vmbr2, а при применении конфигурации сеть отваливается уже на всех внутренних интерфейсах и не поднимается до полного перезапуска сервера. ifdown&&ifup не помогают. Если у кого-то есть решение – буду благодарен.
Сам первый настроенный интерфейс на сервере остается рабочим и доступным.
Странность в том, что гейтом предлагается использовать собственный адрес физического сервера.
Классический вариант, предлагаемый самим Hetzner указан в постановке задачи и был реализован клиентом самостоятельно. В этом варианте клиент теряет первый адрес на адрес сети, второй адрес на бридже proxmox и он же будет шлюзом, и последний адрес для бродкаста. Адреса IPv4 лишними не бывают. Если же вы впрямую попробуете прописать на CHR IP адрес 136.х.х.177/29 и шлюз для 0.0.0.0/0 148.х.х.165 то сделать это сможете, однако шлюз не будет Direct Connected и поэтому будет unreachable.
Выйти из положения можно, если использовать 32 сеть на каждый адрес и в качестве имени сети указав нужный нам адрес, который может быть любым. Получается аналог point-to-point соединения.
В этом случае шлюз разумеется будет доступен, и все будет работать так, как нам нужно.
Учитывайте, что в подобной конфигурации не рекомендуется использовать правило SRC-NAT masquerade, потому что выходной адрес будет неопределенно различным, а правильнее указать action: src-NAT и конкретный адрес, из которого вы будете выпускать клиента.