
Install Compose
Follow the instructions below to install Compose on Mac, Windows, Windows Server
2016, or Linux systems, or find out about alternatives like using the
Python package manager or installing Compose as a container.
Install Compose on macOS
Docker Desktop for Mac includes Compose along
with other Docker apps, so Mac users do not need to install Compose separately.
For installation instructions, see Install Docker Desktop on Mac.
Install Compose on Windows desktop systems
Docker Desktop for Windows includes Compose
along with other Docker apps, so most Windows users do not need to
install Compose separately. For install instructions, see Install Docker Desktop on Windows.
If you are running the Docker daemon and client directly on Microsoft
Windows Server, follow the instructions in the Windows Server tab.
Install Compose on Windows Server
Follow these instructions if you are running the Docker daemon and client directly
on Microsoft Windows Server and want to install Docker Compose.
-
Start an “elevated” PowerShell (run it as administrator).
Search for PowerShell, right-click, and choose
Run as administrator. When asked if you want to allow this app
to make changes to your device, click Yes. -
In PowerShell, since GitHub now requires TLS1.2, run the following:
Then run the following command to download the current stable release of
Compose (v1.29.2):
Note: On Windows Server 2019, you can add the Compose executable to . Because this directory is registered in the system , you can run the command on the subsequent step with no additional configuration.
-
Test the installation.
Install Compose on Linux systems
On Linux, you can download the Docker Compose binary from the
Compose repository release page on GitHub.
Follow the instructions from the link, which involve running the command
in your terminal to download the binaries. These step-by-step instructions are
also included below.
-
Run this command to download the current stable release of Docker Compose:
If you have problems installing with , see
tab above. -
Apply executable permissions to the binary:
For example:
-
Optionally, install command completion for the
and shell. -
Test the installation.
Alternative install options
Install using pip
Compose can be installed from
pypi using . If you install
using , we recommend that you use a
virtualenv because many operating
systems have python system packages that conflict with docker-compose
dependencies. See the virtualenv
tutorial to get
started.
If you are not using virtualenv,
Install as a container
Compose can also be run inside a container, from a small bash script wrapper. To
install compose as a container run this command:
Install pre-release builds
If you’re interested in trying out a pre-release build, you can download release
candidates from the Compose repository release page on GitHub.
Follow the instructions from the link, which involves running the command
in your terminal to download the binaries.
Pre-releases built from the “master” branch are also available for download at
https://dl.bintray.com/docker-compose/master/.
Custom Docker daemon options
There are a number of ways to configure the daemon flags and environment variables
for your Docker daemon. The recommended way is to use the platform-independent
file, which is located in on Linux by default. See
.
You can configure nearly all daemon configuration options using . The following
example configures two options. One thing you cannot configure using mechanism is
a .
Runtime directory and storage driver
You may want to control the disk space used for Docker images, containers,
and volumes by moving it to a separate partition.
To accomplish this, set the following flags in the file:
HTTP/HTTPS proxy
The Docker daemon uses the , , and environmental variables in
its start-up environment to configure HTTP or HTTPS proxy behavior. You cannot configure
these environment variables using the file.
This example overrides the default file.
If you are behind an HTTP or HTTPS proxy server, for example in corporate settings,
you need to add this configuration in the Docker systemd service file.
-
Create a systemd drop-in directory for the docker service:
-
Create a file named
that adds the environment variable:If you are behind an HTTPS proxy server, set the environment
variable:Multiple environment variables can be set; to set both a non-HTTPS and
a HTTPs proxy; -
If you have internal Docker registries that you need to contact without
proxying you can specify them via the environment variable.The variable specifies a string that contains comma-separated
values for hosts that should be excluded from proxying. These are the
options you can specify to exclude hosts:- IP address prefix ()
- Domain name, or a special DNS label ()
- A domain name matches that name and all subdomains. A domain name with
a leading “.” matches subdomains only. For example, given the domains
and :- matches and , and
- matches only
- A single asterisk () indicates that no proxying should be done
- Literal port numbers are accepted by IP address prefixes ()
and domain names ()
Config example:
-
Flush changes and restart Docker
-
Verify that the configuration has been loaded and matches the changes you
made, for example:
-
Create a systemd drop-in directory for the docker service:
-
Create a file named
that adds the environment variable:If you are behind an HTTPS proxy server, set the environment
variable:Multiple environment variables can be set; to set both a non-HTTPS and
a HTTPs proxy; -
If you have internal Docker registries that you need to contact without
proxying, you can specify them via the environment variable.The variable specifies a string that contains comma-separated
values for hosts that should be excluded from proxying. These are the
options you can specify to exclude hosts:- IP address prefix ()
- Domain name, or a special DNS label ()
- A domain name matches that name and all subdomains. A domain name with
a leading “.” matches subdomains only. For example, given the domains
and :- matches and , and
- matches only
- A single asterisk () indicates that no proxying should be done
- Literal port numbers are accepted by IP address prefixes ()
and domain names ()
Config example:
-
Flush changes and restart Docker
-
Verify that the configuration has been loaded and matches the changes you
made, for example:
4, Docker общие команды и операции
1), операция зеркала
| операционная | команда | объяснение |
|---|---|---|
| поиск | ключевое слово для поиска в докере, например: поиск в докере | Мы часто заходим в док-центр, чтобы получить подробную информацию об изображении, такую как TAG изображения. |
| Прицепные | Docker тянуть имя изображения: тег | : тег необязательный, тег означает тег, в основном версия программного обеспечения, по умолчанию самое последнее |
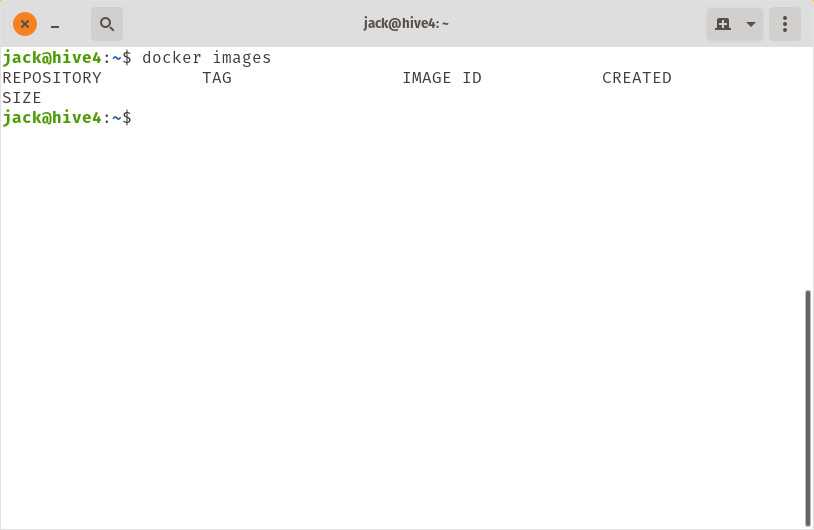
| список | docker images | Посмотреть все местные зеркала |
| Удалить | docker rmi image-id | Удалить указанное локальное зеркало |
2) Контейнерная операция
Образ программного обеспечения (установщик QQ) — образ запуска — создать контейнер (запущенное программное обеспечение, запущенное QQ);
шаги:
1 2 3 4 5 6 7 8 9 10 11 12 13 14 15 16 17 18 19 20 21 22 23 24 25 26 27 28 29 30 |
1. поиск изображений ~]# docker search tomcat 2. Потяните зеркало ~]# docker pull tomcat 3. Запустите контейнер на основе изображения docker run --name mytomcat -d tomcat:latest 4、docker ps Просмотр запущенных контейнеров 5, остановить работающий контейнер идентификатор контейнера остановки докера 6. Просмотр всех контейнеров docker ps -a 7, запустить контейнер Идентификатор контейнера запуска докера 8. Удалить контейнер идентификатор контейнера Docker rm 9, запустить кот с отображением портов ~]# docker run -d -p 8888:8080 tomcat -d: бегать в фоновом режиме -p: сопоставить порт хоста с портом контейнера. Порт хоста: порт внутри контейнера. 10. Для демонстрации брандмауэр linux был просто отключен. сервис firewalld статус, просмотр статуса брандмауэра служба firewalld stop: отключить брандмауэр 11. Просмотр журналов контейнеров docker logs container-name/container-id Посмотреть больше команд https://docs.docker.com/engine/reference/commandline/docker/ Можно ссылаться на каждый зеркальный документ |
Release channels
Docker Engine has three types of update channels, stable, test,
and nightly:
- The Stable channel gives you latest releases for general availability.
- The Test channel gives pre-releases that are ready for testing before
general availability (GA). - The Nightly channel gives you latest builds of work in progress for the
next major release.
Stable
Year-month releases are made from a release branch diverged from the master
branch. The branch is created with format , for example
. The year-month name indicates the earliest possible calendar
month to expect the release to be generally available. All further patch
releases are performed from that branch. For example, once is
released, all subsequent patch releases are built from the branch.
Test
In preparation for a new year-month release, a branch is created from
the master branch with format when the milestones desired by
Docker for the release have achieved feature-complete. Pre-releases
such as betas and release candidates are conducted from their respective release
branches. Patch releases and the corresponding pre-releases are performed
from within the corresponding release branch.
Nightly
Nightly builds give you the latest builds of work in progress for the next major
release. They are created once per day from the master branch with the version
format:
where the time is the commit time in UTC and the final suffix is the prefix
of the commit hash, for example .
These builds allow for testing from the latest code on the master branch. No
qualifications or guarantees are made for the nightly builds.
Conclusion
You’ve now installed Docker Compose, tested your installation by running a “Hello World” example, and explored some basic commands.
While the “Hello World” example confirmed your installation, the simple configuration does not show one of the main benefits of Docker Compose — being able to bring a group of Docker containers up and down all at the same time. To see the power of Docker Compose in action, check out How To Secure a Containerized Node.js Application with Nginx, Let’s Encrypt, and Docker Compose and How To Configure a Continuous Integration Testing Environment with Docker and Docker Compose on Ubuntu 16.04. Although these tutorials are geared toward Ubuntu 16.04 and 18.04, the steps can be adapted for CentOS 7.
Описание платформы
Для того, чтобы системные администраторы и разработчики могли заниматься разработкой, развертыванием и запуском приложений в контейнерах, которые находятся в изоляции друг с другом, была создана платформа Docker.
Контейнеризация – процесс, при котором приложения Линукс развертываются в контейнерах. Идея об изолировании приложений возникла еще при создании первых моделей ПК, а применяться на практике начала только недавно. Популярности контейнеризации поспособствовали высокие темпы развития ПО.
Итак, в чем главные отличия образа от контейнера:
- Под образом подразумевается некий исполняемый пакет, в который включены библиотеки, программный код, конфигурационные файлы, среда выполнения и ее переменные – все, что требуется для открытия приложения.
- Под контейнером подразумевается экземпляр образа. То есть один образ может вмещать в себя сразу несколько контейнеров.
Открыть образы можно в режиме «для чтения». Образы платформы делятся на два вида: дистрибутивы Линукс и сконфигурированное корпоративное ПО, подготовленное к запуску. Вид можно прописать в специальном файле Dockerfile. Он представляет собой файл текстового формата, который может понять только демон Docker. Файл создается для того, чтобы можно было запустить новый образ.
Обратите внимание: демоном называется компонент Docker, которому поручено выполнять трудные задачи создания, распределения и запуска изображений сразу после поступления команды от Docker-клиентов. Открыть приложение на платформе можно в несколько шагов:
Открыть приложение на платформе можно в несколько шагов:
- Выбрать нужное приложение.
- Описать его в Dockerfile, указать среду для выполнения приложения.
- Сформировать общий файл – образ, который будет включать в себя набор библиотек (без общей системной) и исполняемые файлы. Все элементы войдут в контейнер и станут неизменными при дальнейшей работе.
- Запустить платформу, в которой уже указан образ приложения, использующегося для решения прикладной задачи.
Образы Docker
Образ Docker состоит из серии слоев, представляющих инструкции в файле Dockerfile образа, которые составляют исполняемое программное приложение. Изображение — это неизменяемый двоичный файл, включающий приложение и все другие зависимости, такие как двоичные файлы, библиотеки и инструкции, необходимые для запуска приложения. Короче говоря, образ Docker — это, по сути, снимок контейнера Docker.
Docker Hub — это облачная служба реестра, которая, помимо прочего, используется для хранения образов Docker в общедоступном или частном репозитории.
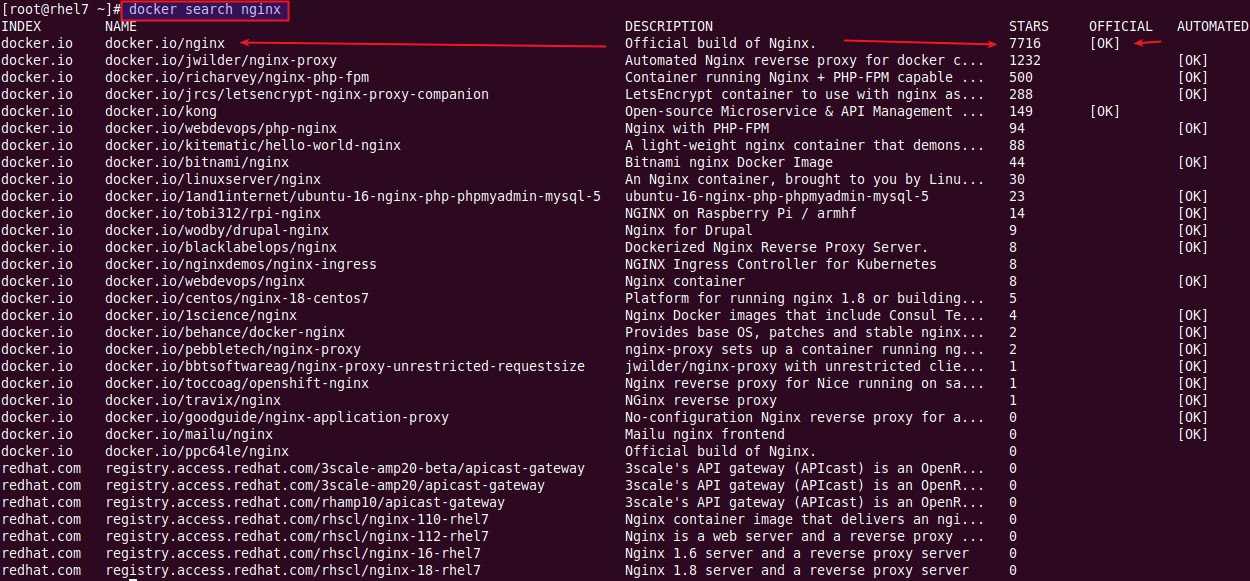
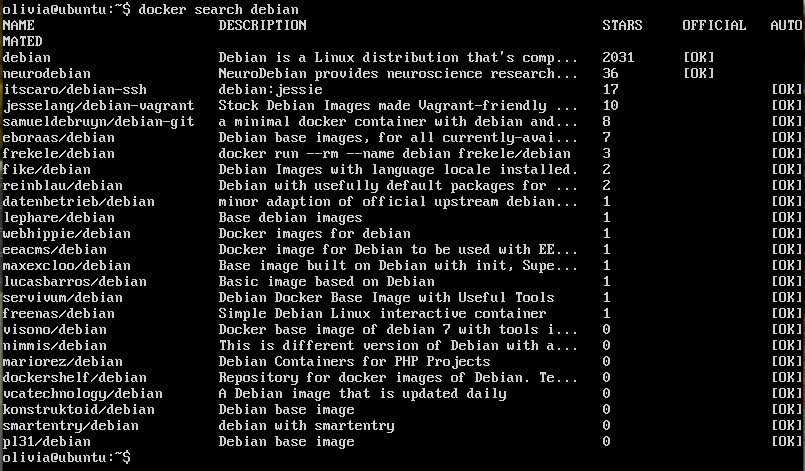
Для поиска изображения в репозитории Docker Hub просто используйте подкоманду . Например, чтобы найти образ CentOS, запустите:
Результат должен выглядеть следующим образом:
Как видите, в результатах поиска отображается таблица с пятью столбцами: , , , и . Официальный образ — это образ, который Docker разрабатывает совместно с партнерами по разработке.
Если мы хотим загрузить официальную сборку CentOS 7, мы можем сделать это с помощью подкоманды :
В зависимости от скорости вашего Интернета загрузка может занять несколько секунд или несколько минут. После загрузки изображения мы можем перечислить изображения с помощью:
Результат должен выглядеть примерно так:
Если по какой-то причине вы хотите удалить изображение, вы можете сделать это с помощью подкоманды :
Support
Docker Engine releases of a year-month branch are supported with patches as
needed for one month after the next year-month general availability release.
This means bug reports and backports to release branches are assessed
until the end-of-life date.
After the year-month branch has reached end-of-life, the branch may be
deleted from the repository.
Backporting
Backports to the Docker products are prioritized by the Docker company. A
Docker employee or repository maintainer will endeavour to ensure sensible
bugfixes make it into active releases.
If there are important fixes that ought to be considered for backport to
active release branches, be sure to highlight this in the PR description
or by adding a comment to the PR.
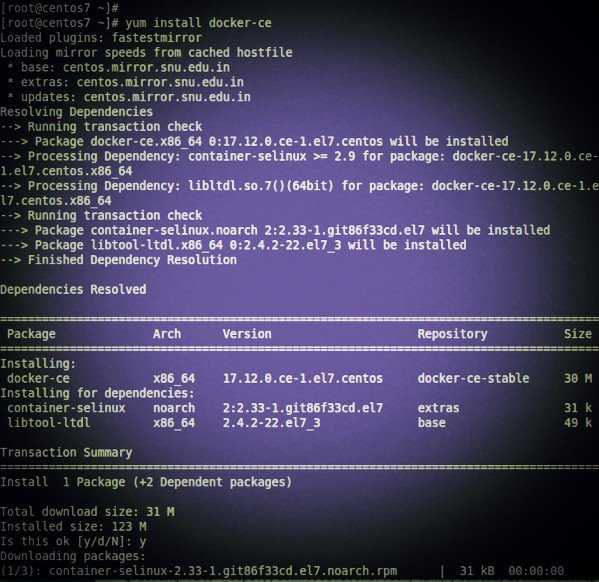
Установка Docker CE
Так, как мы уже с Вами добавили хранилище Docker-CE, то мы можем перейти непосредственно к установки пакетов. При помощи пакетного менеджера DNF проверим список пакетов Dockera доступных для установки в CentOS8/RHEL8, для этого в консоли наберем и выполним следующую команду:
Попробуем установить наберем команду:
И перед нами появится такая вот замечательная ошибка. Чем она вызвана? Сама компания RedHat не дает установить на системы CentOS8/RHEL8 версии docker-ce в которых используется зависимость containerd.io>=1.2.2-3. По этой причине не работает простая установка.
Однако все же данная проблема решаема и если мы хотим обойти данную проблему и продолжить установку у нас есть три варианта:
- Установите конкретную версию, для которой требуется устанавливаемая версия пакета;
- Принудительная установка с предоставлением опции
- Установить последние доступные вручную;
Для начала рассмотрим установку конкретной версии docker-ce.
Установка конкретной версии docker-ce
Для установки конкретной версии, нам необходимо предоставить полное имя пакета, например:
На момент написания статьи вы можете установить:
- docker-ce-3:18.09.1-3.el7
- docker-ce-18.06.3.ce-3.el7
- docker-ce-17.12.1.ce-1.el7.centos
Как видите нам остается только лишь принять установку и далее она пройдет без проблем.
Далее рассмотрим пример установки с опцией —nobest.
Принудительная установка docker-ce с опцией —nobest
Обычно при установке пакета наилучший доступный кандидат выбирается из репозитория. В этом случае, например, попытка установки последней версии (и сбой). Используя эту опцию, мы можем изменить это поведение, чтобы первая версия с удовлетворительными зависимостями была выбрана как «резервная», в этом случае 18.06.3.ce-3.el7.


Как видите установка так же будет запущена без проблем и нам останется только принять установку в CentOS нажав y.
Теперь давайте рассмотрим последний вариант, установка containerd.io вручную.
Установите последний доступный пакет containerd.io вручную
Итак, как же установить последний доступный пакет containerd.io, а все очень просто, нам необходимо скачать пакет containerd.io вручную из репозиториев dockera. Для этого выполним команду:
Будет произведена установка последний на текущий момент версии, и замене стандартный пакет версии 1.0.0-55. По окончании установки containerd.io на CentOS8, запустим команду установки контейнера dockera:
И на CentOS8 без проблем начнется установка docker-ce последней актуальной версии.
Теперь нам осталось лишь запустить демон dockera и добавить его в автозагрузку, для этого мы используем команду:
После чего проверим, что docker-ce успешно запустился на CentOS8.
На этом установка docker-ce успешно завершена и вы можете работать с ним на CentOS8, далее мы рассмотрим как установить docker compose.
2.2 Отражение связанных команд
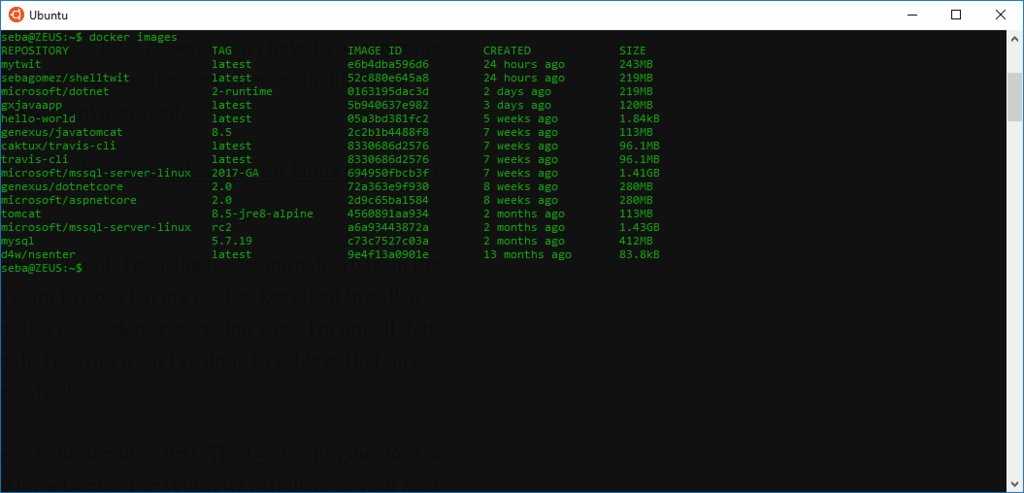
2.2.1 Просмотр изображения
РЕПОЗИТОРИЙ: имя зеркала
ТЕГ: Зеркальный тег
IMAGE ID: ID изображения
СОЗДАНО: дата создания изображения (а не дата, когда изображение было получено).
РАЗМЕР: размер зеркала
Эти изображения хранятся в каталоге / var / lib / docker хоста Docker.
2.2.2 Зеркало поиска
НАЗВАНИЕ: Название склада
ОПИСАНИЕ: описание зеркала
ОФИЦИАЛЬНО: это официально
АВТОМАТИЧЕСКИЙ: автоматическая сборка, указывающая, что образ был создан в процессе автоматической сборки Docker Hub.
2.2.3 Поднимите зеркало
Вытащить зеркало — значит загрузить зеркало с центрального склада на локальный.
Например, я хочу скачать зеркало centos7
Supported platforms
Docker Engine is available on a variety of ,
macOS and Windows 10
through Docker Desktop, and as a static binary installation. Find
your preferred operating system below.
Server
Docker provides and packages from the following Linux distributions
and architectures:
| Platform | x86_64 / amd64 | arm64 / aarch64 | arm (32-bit) | s390x |
|---|---|---|---|---|
| CentOS | ||||
| Debian | ||||
| Fedora | ||||
| Raspbian | ||||
| RHEL | ||||
| SLES | ||||
| Ubuntu | ||||
| Binaries |
Other Linux distributions
- Users of Debian derivatives such as “BunsenLabs Linux”, “Kali Linux” or
“LMDE” (Debian-based Mint) should follow the installation instructions for
Debian, substituting the version of their distro for the
corresponding Debian release. Refer to the documentation of your distro to find
which Debian release corresponds with your derivative version. - Likewise, users of Ubuntu derivatives such as “Kubuntu”, “Lubuntu” or “Xubuntu”
should follow the installation instructions for Ubuntu,
substituting the version of their distro for the corresponding Ubuntu release.
Refer to the documentation of your distro to find which Ubuntu release
corresponds with your derivative version. - Some Linux distributions are providing a package of Docker Engine through their
package repositories. These packages are built and maintained by the Linux
distribution’s package maintainers and may have differences in configuration
or built from modified source code. Docker is not involved in releasing these
packages and bugs or issues involving these packages should be reported in
your Linux distribution’s issue tracker.
Docker provides binaries for manual installation of Docker Engine.
These binaries are statically linked and can be used on any Linux distribution.
Step 1 — Installing Docker
The Docker installation package available in the official CentOS 7 repository may not be the latest version. To get the latest and greatest version, install Docker from the official Docker repository. This section shows you how to do just that.
But first, let’s update the package database:
Now run this command. It will add the official Docker repository, download the latest version of Docker, and install it:
After installation has completed, start the Docker daemon:
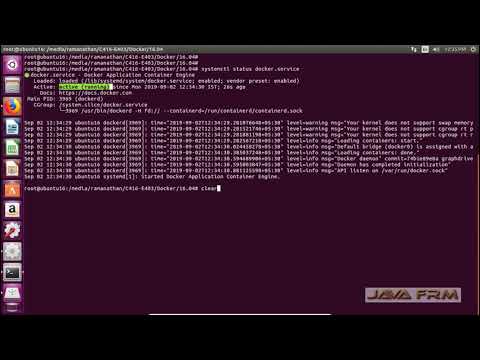
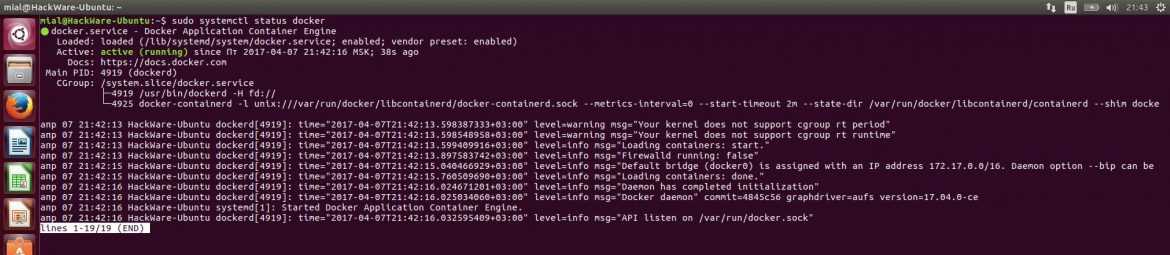
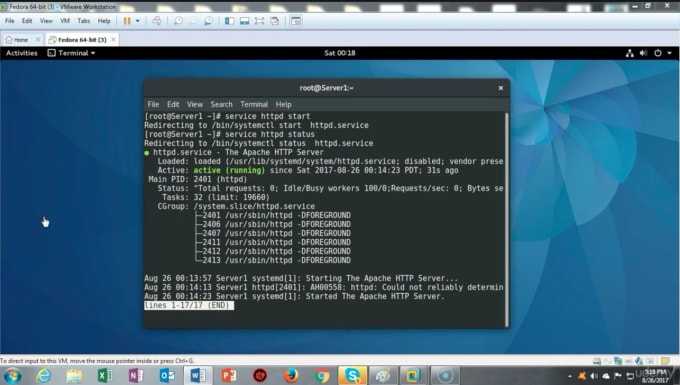
Verify that it’s running:
The output should be similar to the following, showing that the service is active and running:
Lastly, make sure it starts at every server reboot:
Installing Docker now gives you not just the Docker service (daemon) but also the command line utility, or the Docker client. We’ll explore how to use the command later in this tutorial.

Этапы установки Docker Compose
Зайдите на свой хост, содержащий Docker, и по порядку запустите команды, перечисленные ниже:
Примечание
Для стабильной работы Docker Compose рекомендуем использовать менеджер пакетов pip версии 6.0 или выше. Если версия pip ниже 6.0, выполните команду для его обновления:
# pip install —upgrade pip
Проверьте версию Docker командой:
Развертывание контейнеров инструментом Docker Compose
Создайте каталог и в нем же файл compose с именем «docker-compose.yml» или «docker-compose.yaml». В файле compose мы определим сервисы для приложений и образы контейнеров.
Прежде чем приступить к созданию compose-файла, скачайте образы контейнеров WordPress и MySQL:
Затем создайте каталог с именем «siteonwordpress»:
Далее создайте файл docker-compose.yml с перечисленным содержимым:
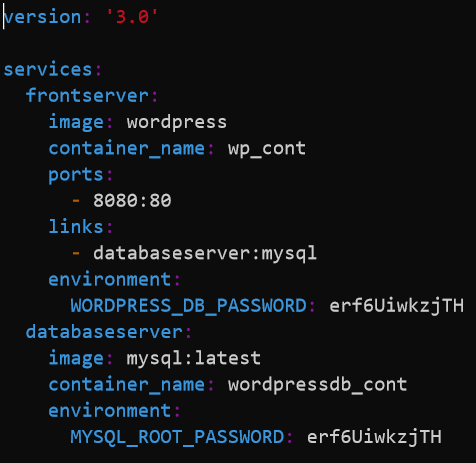
В приведенном выше файле compose были определены два сервиса с именами «frontserver» и «databaseserver». Для этих сервисов также указаны образы контейнера
Помимо этого были определены переменные среды и упомянуты пароли root mysql и db wordpress. Обращаем внимание, что отступы осуществляются пробелами, в соответствии с YAML-разметкой
Давайте развернем наше приложение, то есть сайт на WordPress, с помощью команды:
Примечание
Выполнять запуск «docker-compose up» следует из каталога, в котором находится файл docker-compose.
Команда выше развернет два контейнера с именами «wp_cont» и «wordpressdb_cont». Попробуйте получить доступ к своему сайту WordPress, используя следующий URL:
Следуйте инструкциям на экране, чтобы завершить установку WordPress. Это подтверждает, что сайт WordPress был успешно развернут внутри контейнеров благодаря использованию утилиты docker-compose.
Далее рассмотрим параметры команды «docker-compose».
Остановка и запуск контейнеров и их служб
Можно нажать Ctrl+C во время выполнения «docker-compose up» или выполнить команду:
Выполните команду «docker-compose start», чтобы запустить контейнеры и их службы:
Просмотр журналов контейнеров
Чтобы просмотреть журналы контейнеров и журналы определенного контейнера, запустите команду «docker-compose logs {service-name}»:
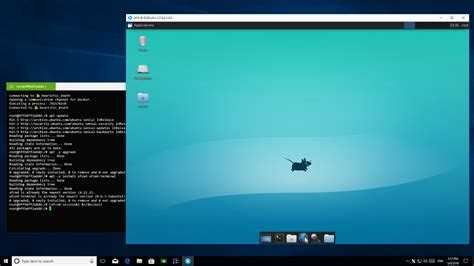
Установка Docker на CentOS/RedHat/Fedora
Docker – открытый движок, автоматизирующий развертывание приложений в легковесные, переносимые, самодостаточные контейнеры, которые могут без изменений переноситься между серверами.
Тот же самый контейнер, который разработчик создает и тестирует на ноутбуке, может быть легко перенесен на продакшн-сервера в облако и так же легко смигрирован в другой регион при необходимости.
Основные способы использования Docker:
- Автоматизация упаковки и развертывания приложений
- Создание собственных легковесных PaaS окружений
- Автоматизация тестирования и непрерывной интеграции/развертывания
- Развертывание и масштабирование веб-приложений, баз данных и сервисов бекенда
В данной статье «Установка Docker на CentOS/RedHat/Fedora» я расскажу как можно установить Docker на CentOS\RedHat или Fedora.
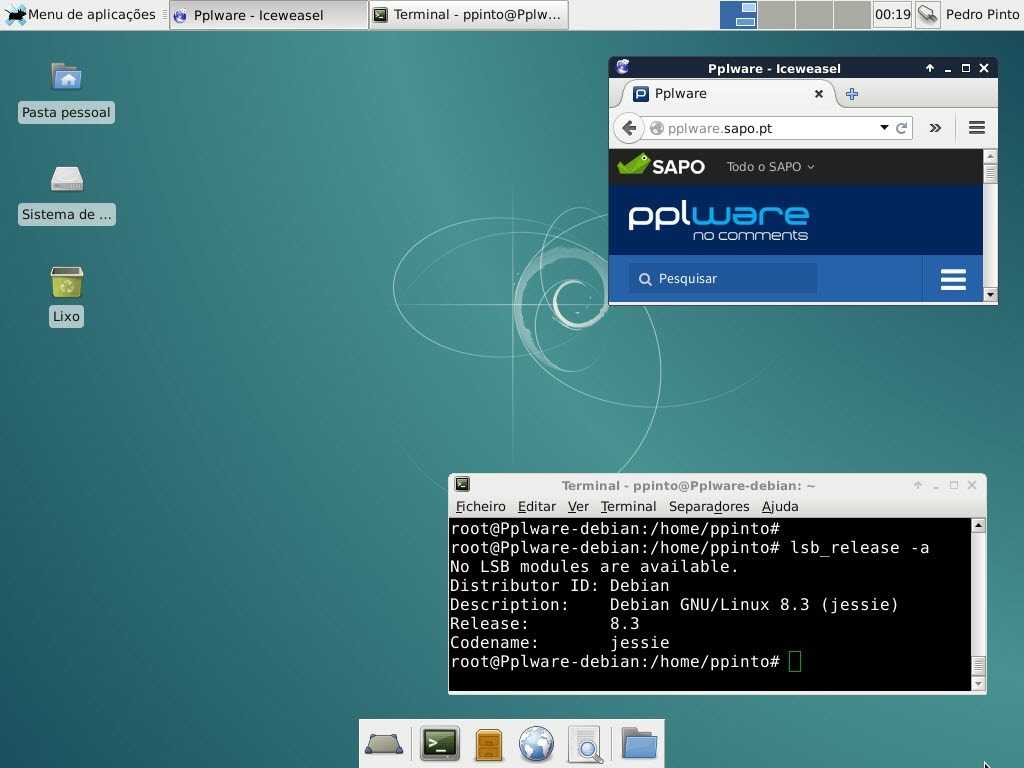
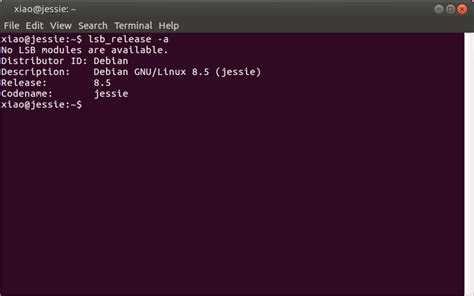
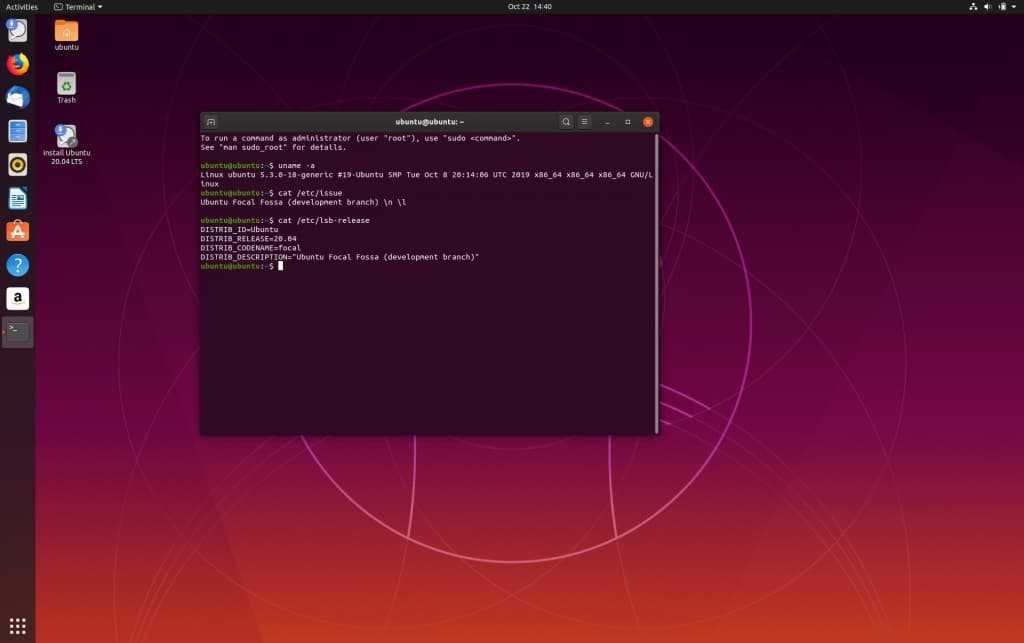
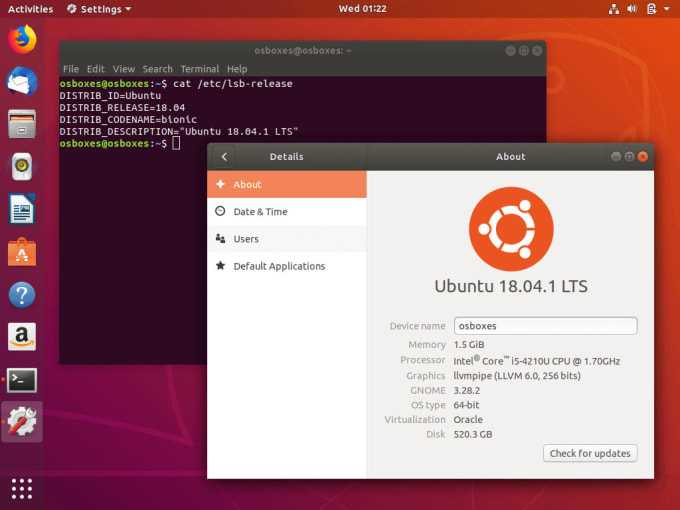
Если не знаете версию ОС, то проверить можно:
$ cat /etc/issue
Установка Docker на CentOS/RedHat.
В то время как пакет Докер предоставляется по умолчанию как часть CentOS-7, это предусмотрено в хранилище EPEL для CentOS-6
Пожалуйста, обратите внимание, что это немного меняет инструкции по установке различных версий. Если вам потребуется последняя версия, вы всегда можете использовать самую последнюю версию и скачать его бинарный файл, который работает на ядре 3.8 или выше
Эти инструкции работают для CentOS 6 и более поздних версий. Они, скорее всего, будут работать для других бинарных совместимых дистрибутивов EL6, таких как Scientific Linux, но они не были проверены.
Пожалуйста, обратите внимание, что из-за существующих ограничений Docker, он может работать только на 64-битной архитектуры. Чтобы запустить Docker вам нужно CentOS6 или выше, с ядром версии 2.6.32-431 или выше
Чтобы запустить Docker вам нужно CentOS6 или выше, с ядром версии 2.6.32-431 или выше.
Установка Docker на CentOS 7
-===Способ 1===-
Docker включен по умолчанию в хранилище CentOS-Extras. Для установки просто запустите следующую команду:
$ sudo yum install docker -y
Ручная установка последней версии
При использовании пакета что представлен выше, рекомендуемым способом установки Docker, вы можете не поставить последнюю версию. Если вам потребуется последняя версия, вы можете устанавливать программу напрямую для этого нужно скачать исходный код программы.

При установке бинарного файла без пакета, вы можете интегрировать Docker с Systemd. Для этого просто установите две единичные файлы (service и socket) из репозитория GitHub к /etc/systemd/system.
FirewallD
CentOS-7 реалезована firewalld -обертка вокруг IPTables и которая может конфликтовать с Докер.
Когда firewalld будет запущен или перезапущен, то он будет удалять связь с докер от IPTables, предотвращая Docker и давая возможность работать ему должным образом.
При использовании Systemd, firewalld запускается до запуска докера, но если вы запустите или перезапустите firewalld после запуска докера, вам придется перезапустить сам демон Docker.
-===Способ 2 — использовать официальный репозиторий===-
Устанавливаем необходимое ПО:
# yum install -y yum-utils makecache fast device-mapper-persistent-data lvm2
Добавляем репозиторий:
$ sudo yum-config-manager --add-repo https://download.docker.com/linux/centos/docker-ce.repo
Устанавливаем последнюю версию Docker CE на CentOS:
# yum -y install docker-ce
Запуск Docker-а:
# systemctl start docker
Установка Docker на CentOS 6
-===Способ 1===-
Пожалуйста, обратите внимание, что это для CentOS-6, этот пакет является частью дополнительных пакетов для Enterprise Linux (Epel), по этому нужно подключить EPEL репозиторий. Пакет docker-io обеспечивает установку Docker через Epel
Пакет docker-io обеспечивает установку Docker через Epel.
Если вы уже установили (не связанный) докер пакет, он будет конфликтовать с Docker-IO. Чтобы продолжить установку c Docker-IO, пожалуйста, удалите докер в первую очередь.
Далее, давайте установим docker-io пакет, который установит Docker:
$ sudo yum install docker-io -y
-===Способ 2 — использовать официальный репозиторий===-
Приводил пример установки вверху.
Установка Docker на Fedora
Docker CE поддерживает:
- Fedora 25
- Fedora 24
Устанавливаем нужное ПО:
# dnf -y install dnf-plugins-core makecache fast
Добавляем репозиторий:
# dnf config-manager --add-repo https://download.docker.com/linux/fedora/docker-ce.repo
Устанавливаем последнюю версию Docker CE:
# dnf -y install docker-ce
Step 4 — Working with Docker Images
Docker containers are run from Docker images. By default, it pulls these images from Docker Hub, a Docker registry managed by Docker, the company behind the Docker project. Anybody can build and host their Docker images on Docker Hub, so most applications and Linux distributions you’ll need to run Docker containers have images that are hosted on Docker Hub.
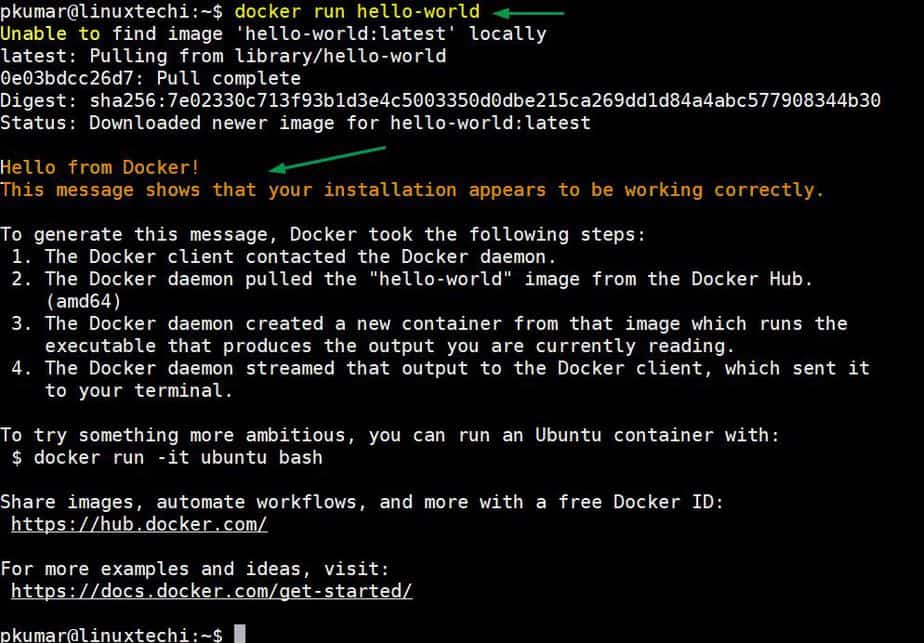
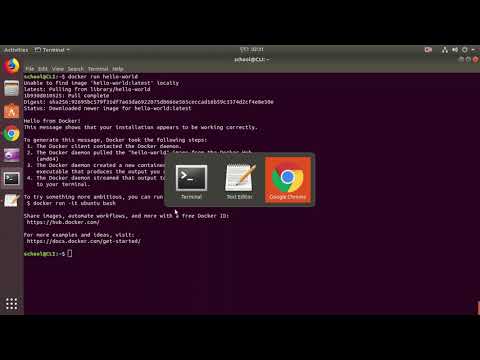
To check whether you can access and download images from Docker Hub, type:
The output, which should include the following, should indicate that Docker in working correctly:
You can search for images available on Docker Hub by using the command with the subcommand. For example, to search for the CentOS image, type:
The script will crawl Docker Hub and return a listing of all images whose name match the search string. In this case, the output will be similar to this:
In the OFFICIAL column, OK indicates an image built and supported by the company behind the project. Once you’ve identifed the image that you would like to use, you can download it to your computer using the subcommand, like so:
After an image has been downloaded, you may then run a container using the downloaded image with the subcommand. If an image has not been downloaded when is executed with the subcommand, the Docker client will first download the image, then run a container using it:
To see the images that have been downloaded to your computer, type:
The output should look similar to the following:
As you’ll see later in this tutorial, images that you use to run containers can be modified and used to generate new images, which may then be uploaded (pushed is the technical term) to Docker Hub or other Docker registries.
Step 4 — Accessing the Docker Container Filesystem
In order to work on the command prompt inside a container and access its filesystem, you can use the command.
The “Hello World” example exits after it runs, so to test out , start a container that will keep running. For the purposes of this tutorial, use the Nginx image from Docker Hub.

Create a new directory named and move into it:
Next, make a file in your new directory and open it in a text editor:
Next, add the following lines to the file:
~/nginx/docker-compose.yml
Save the file and exit. Start the Nginx container as a background process with the following command:
Docker Compose will download the Nginx image and the container will start in the background.
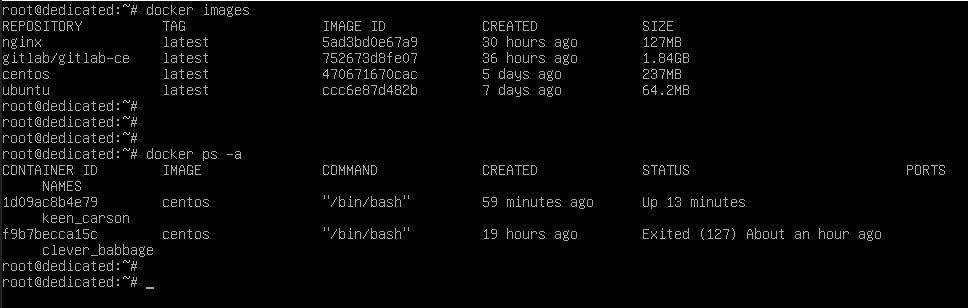
Now you will need the for the container. List all of the containers that are running with the following command:
You will see something similar to the following:
If you wanted to make a change to the filesystem inside this container, you’d take its ID (in this example ) and use to start a shell inside the container:
The option opens up a terminal, and the option makes it interactive. opens a bash shell to the running container.
You will then see a bash prompt for the container similar to:
From here, you can work from the command prompt inside your container. Keep in mind, however, that unless you are in a directory that is saved as part of a data volume, your changes will disappear as soon as the container is restarted. Also, remember that most Docker images are created with very minimal Linux installs, so some of the command line utilities and tools you are used to may not be present.


